

This year, never mind the ornaments and garlands that travelled thousands of miles to land on store shelves. You don’t need to buy anything for your Christmas tree; we teach you how to make your own decorations using what you have on hand and would otherwise find their way to the bin. Recycling is also part of the Christmas spirit!
We have a great activity to do with your kids on a cold December weekend. We also have a few heartwarming drink suggestions to make this day even more festive. Because a day decorating the tree is not complete without a nice warm beverage!
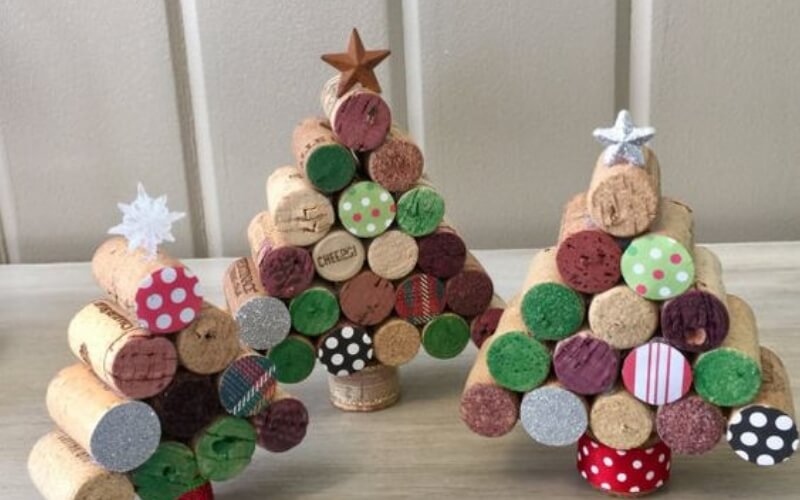
Using cork plugs
Little trees much cuter than those on your rear-view mirror
Paint 10 cork plugs green (forest, soft, bright, etc.) and 2 brown. Using hot glue, attach 4 green corks together horizontally. Next, add 3 over top, then 2, and finally 1, to ultimately form a pyramid. Use the 2 brown corks to make the trunk. Add a pretty ribbon around the trunk and decorate the tree using trimmings of your choice to resemble lights, balls, and garlands. Finally, add a tack to the top of your cork tree and attach a thread or string so you can hang your ornament.
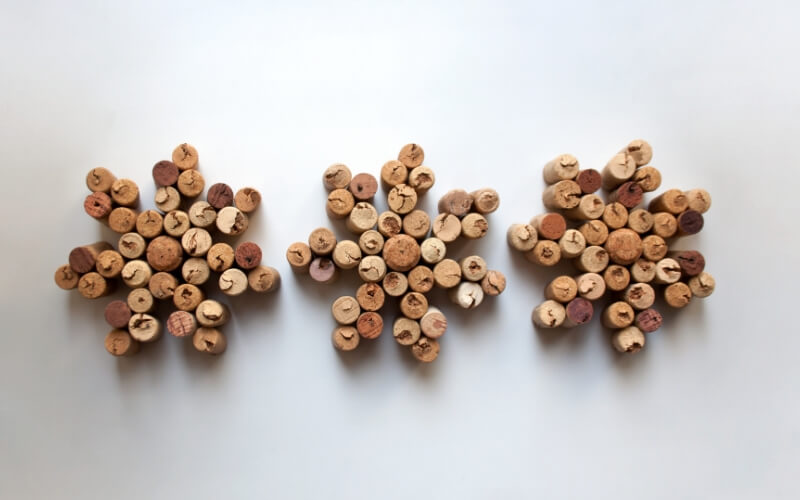
Rustic snowflakes
First, boil your cork plugs approximately 10 minutes, stirring frequently. This simple tip makes it easier for a knife to slice through the cork to make thinner circles. Form a line using 3 circles and stick them together. Next, attach a row of 4 circles above and below your initial row. Finish with a single circle at the top and at the bottom. Paint or dye your ornament to your liking. Add a string or ribbon along the contour, creating a loop to hang the ornament. Voilà! Now you have a fun little snowflake (who would’ve thought?)!
With toilet paper rolls
Perched Santas
Paint the toilet paper rolls red. Let dry. Cut one end triangularly, sticking the resulting two tips together; use a clothespin to hold them together as they dry. During this time, cut the base to be used for Santa’s face from a white paper.
Using a skin-coloured construction paper, cut a rectangle, with one length wavy. Attach googly eyes or draw them on. Stick onto the white paper. Next, draw a red nose, and add a smile to the beard. You can now attach the face to the toilet paper roll. Make a small hole at the top of the roll and slide a ribbon or string of your choice through, so you can hang your ornament onto the tree. The final touch: a cotton ball on the tip of Santa’s hat, for the pompom.

Calming snowflakes
Paint the inside and outside of a toilet paper roll white. Flatten the roll and cut it into equal-sized strips. Stick the tip of 5 pieces together, flat, to shape into a snowflake. Hide the joint with a small decoration of your choice.
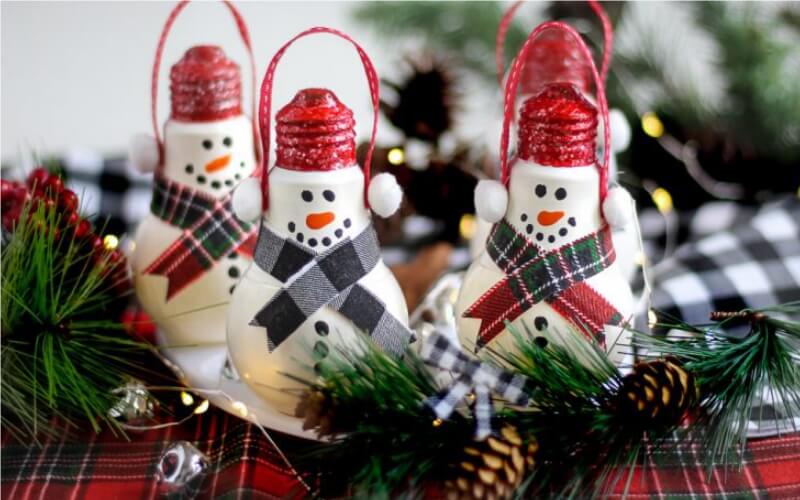
With burnt lightbulbs
Second-chance ornaments
Here’s a great way to give your old light bulbs new purpose. Take out some finger paint, glitter, and wrapping paper scraps, which you can stick using Mod Podge to create beautiful new ornaments.
Special family moments to be savoured
All this creativity deserves to be rewarded. Why not make yourself an invigorating hot cider? Place slices of orange with cloves inserted into the peel into some cider (ideally flat) or apple must (for an alcohol-free version) and add a bit of brown sugar. Add a little kick to it with a drop of brown rum. Boil in a casserole for about 10 minutes and let infuse a few minutes longer.
For the little ones, how about a homemade hot chocolate? Simply heat some almond milk in the microwave. Next, in each cup, add organic 70% dark chocolate, maple syrup, a little vanilla extract, and orange zest. Let the chocolate melt, stir, and watch for the twinkle in your kids’ eyes!
For the ultimate treat: serve your drinks with gingerbread cookies made with the Lulubelle & Co. mix.

